SPEAK TO THE EXPERTS

  • phone-icon
  • 020 8964 9368

SEND US AN EMAIL

  • mail-icon
  • sales@dennyplastics.co.uk

Blog

Categories
blogpost

Beyond the Basics: Advanced Moulding Techniques for Acrylic Sheets

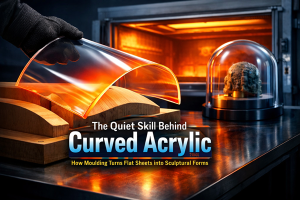
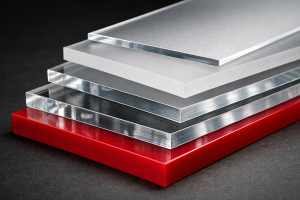
Acrylic sheets, known for their clarity and versatility, are a popular choice for various applications. While basic techniques like bending and glueing can achieve simple shapes, complex designs demand venturing into advanced moulding methods. This blog post delves into techniques that push the boundaries of what’s possible with acrylic, allowing you to create unique and functional pieces.

1. Heat Bending:

This method utilises heat to soften the acrylic sheet, making it pliable for shaping around a mould.

Techniques:

  • Strip Heater: A focused heat source like a strip heater allows for precise control over the bend area.
  • Oven Bending: For larger bends, acrylic can be heated in a temperature-controlled oven, followed by quick-forming around a mould.

2. Vacuum Forming:

This technique involves applying heat and a vacuum to form the acrylic sheet over a mould cavity.

Process:

  • The acrylic sheet is heated until pliable.
  • A vacuum is applied, forcing the softened sheet to conform to the mold’s shape.
  • The acrylic cools and retains the moulded form.

3. Pressure Forming:

Similar to vacuum forming, pressure forming utilises compressed air to push the heated acrylic sheet onto a mould. This technique is suitable for deeper and more complex shapes.

4. Chemical Bending:

This method involves applying a solvent along a designated scoreline on the acrylic sheet. The solvent weakens the material, allowing it to be bent along the scoreline.

  • Important Note: Chemical bending requires specific solvents compatible with acrylic and should only be attempted with proper safety measures and ventilation.

5. CNC Machining:

Computer Numerical Control (CNC) machining utilises computer-controlled tools to precisely cut and shape acrylic sheets. This method offers exceptional precision for intricate designs and lettering.

Beyond the Technique:

  • Polishing: After moulding, polishing removes surface imperfections and enhances the acrylic’s optical clarity.
  • Bonding: Acrylic pieces can be securely bonded using specialized adhesives to create complex structures.

Safety First:

Always prioritise safety when working with acrylic. Utilise proper ventilation, wear necessary personal protective equipment, and thoroughly research each technique before attempting it.

Conclusion:

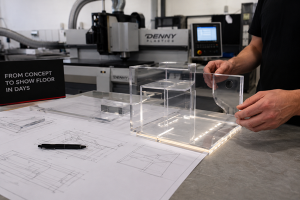
Mastering these advanced moulding techniques opens a world of possibilities for working with acrylic sheets. From creating unique art pieces to fabricating functional objects, these methods allow you to translate your vision into reality. Remember, with practice and knowledge, you can push the boundaries of what’s achievable with this versatile material.

Categories
blogpost

How is Perspex Manufactured?

Perspex, a brand name for acrylic sheet, is a versatile and popular material used in various applications, from construction and signage to furniture and even medical devices. But have you ever wondered how this transparent wonder comes to life? While we may not manufacture Perspex ourselves, we are a leading supplier and fabricator of the material, and by delving into the broader Perspex manufacturing process, we can shed light on this fascinating journey.

The Birth of a Sheet:

  1. Raw Materials: The story begins with a combination of liquid monomers, the building blocks of Perspex. These monomers, primarily methyl methacrylate (MMA), are carefully chosen and measured to achieve the desired properties like clarity, strength, and thickness.
  2. Polymerisation: The magic happens in a process called polymerisation. The liquid monomers are heated and stirred under controlled conditions, causing them to link together and form long chains, essentially creating the plastic structure of Perspex.
  3. Casting or Extrusion: Depending on the desired thickness and application, Perspex can be formed through two primary methods:

Casting: Molten Perspex is poured into molds of the desired shape and thickness. Once cooled and solidified, the Perspex sheet is removed from the mold. This method is suitable for thicker sheets and allows for the incorporation of pigments or additives for coloured or specialised Perspex.

Extrusion: For thinner sheets, molten Perspex is forced through a die of the desired shape, similar to how toothpaste is extruded from a tube. This method is faster and more efficient for producing large quantities of thinner Perspex sheets.

The Finishing Touches: After formation, the Perspex sheets undergo various finishing processes, including:

  • Cooling: The newly formed sheets are carefully cooled to ensure proper solidification and prevent warping.
  • Annealing: This process involves controlled heating and cooling to relieve internal stresses within the material, improving its strength and optical clarity.
  • Surface Finishing: Depending on the intended use, the Perspex sheet may be polished, textured, or coated with additional layers for specific functionalities.

From Molten Liquid to Versatile Material:

The journey of Perspex from raw materials to the finished sheet is a testament to modern material science and engineering. Understanding this process allows us to appreciate the intricate steps involved in creating this widely used and versatile material that plays a significant role in our daily lives.

Remember, while here at Dennyplastics.co.uk we may not manufacture Perspex, we are experts in supplying and fabricating it into various shapes and applications. Make sure to take a look around our website to learn more about our services and explore the endless possibilities of Perspex!